
Global Settings
Global Settings holds the organisation-wide controls that apply to every member of your account: the email-OTP login fallback, the trusted Microsoft Entra (Azure AD) tenant for single sign-on, and which finding types appear in the Vendor Risk Monitoring digest email. These are account-level switches, not per-user preferences.
Overview
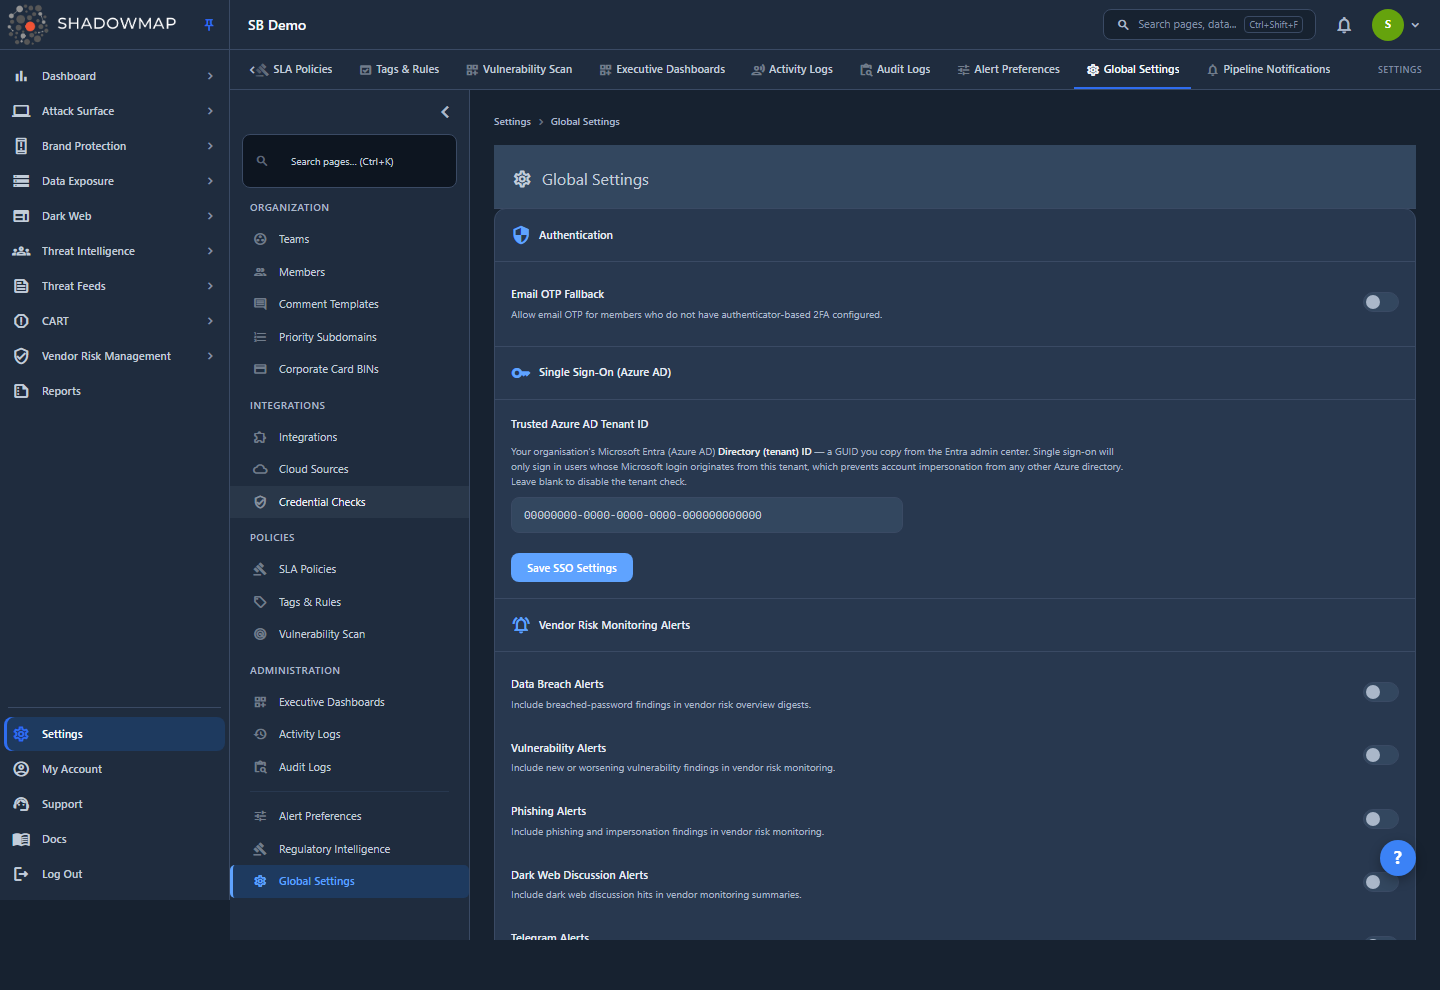
The page is a single scrolling card split into three sections:
- Authentication — the Email OTP Fallback toggle.
- Single Sign-On (Azure AD) — the trusted Azure tenant GUID, with its own Save button.
- Vendor Risk Monitoring Alerts — five toggles that decide what the vendor digest email includes.
A Save Settings button at the bottom commits the Authentication and Vendor toggles together; a Reset button discards unsaved changes by re-fetching the stored values. The SSO field saves independently through its own Save SSO Settings button.
Administrators only
Global Settings is restricted to users with the administrator role. Members with any other role are redirected to the dashboard if they navigate here directly. The settings apply to the whole company, so a change made by one admin affects every member.
How it works
The mechanics behind each control matter more than the toggles themselves, because they change how people log in and what lands in their inbox.
Email OTP Fallback
When Email OTP Fallback is on, an emailed one-time code is enforced for every member of the account before they reach the dashboard — it is an additional email factor layered on top of whatever else the member already uses, not a fallback limited to people without an authenticator. Members with authenticator-based (TOTP) two-factor complete their TOTP challenge first and are then sent the email code; members without an authenticator go straight to the email code after their password. Either way, the email step must be satisfied before the dashboard loads.
The email step fires whenever the toggle is on, regardless of whether the member also uses an authenticator app. Once a member enters a valid email code, the OTP step is satisfied for that session for a fixed time-to-live; after it expires, the next sign-in prompts for a fresh code. Because it is enforced company-wide, it acts as an extra email-based second factor for everyone — it is not a replacement for enforcing app-based 2FA, which is the stronger factor.
Email OTP vs. app-based 2FA
When enabled, Email OTP applies to the whole company as an email-based second factor — including members who already use an authenticator, who get it in addition to their TOTP step. Email codes are weaker than a TOTP app, so for the strongest posture also enforce app-based 2FA at the account level; on its own, Email OTP does not require anyone to enrol in an authenticator app.
Single Sign-On — trusted Azure AD tenant
The Trusted Azure AD Tenant ID field registers a single Microsoft Entra (Azure AD) directory as an explicitly trusted issuer for single sign-on. You paste your organisation's Directory (tenant) ID — a GUID you copy from the Entra admin center — and ShadowMap will accept and bind an Azure SSO login for one of your users when the incoming Microsoft token comes from that tenant.
This backs ShadowMap's impersonation guardrail, but it is not the whole of it. ShadowMap never signs a user in on the email address alone: an Azure login is accepted only when the token's immutable tenant and object IDs (tid/oid) match the identity already bound to that user, or — on first login — come from a trusted issuer (this registered tenant, a directory Microsoft confirms owns the email domain, or an operator allowlist). A token from a different, untrusted directory is rejected at the callback even when the email matches — and this fail-closed check applies whether or not you set a tenant here.
- The value must be a valid GUID (
00000000-0000-0000-0000-000000000000). The same regex is enforced in the browser and on the server, so an invalid value is rejected with a 422 rather than silently stored. - Leaving the field blank clears it, removing this pre-authorised tenant; the page confirms with a "Tenant check disabled" message. This does not open sign-in to any directory — the tenant/object-ID binding and verified-domain checks still fail closed — it only removes the one tenant you had pre-authorised for first-login binding.
- There is one trusted tenant per account; saving a new GUID replaces the previous one.
Where to find your tenant ID
In the Microsoft Entra admin center (or Azure portal), open Identity → Overview (or Azure Active Directory → Overview) and copy the Directory (tenant) ID. It is a GUID, not your domain name.
Vendor Risk Monitoring Alerts
The five toggles in this section do not generate alerts on their own. They control which finding categories are included in the Vendor Risk Overview email — the digest ShadowMap sends summarising risk across the third parties you monitor in Vendor Risk Management. Each enabled toggle adds its corresponding per-vendor count to the report; a disabled toggle removes that category from the digest entirely (the underlying data is still collected and visible in the product — only the email content changes).
Because the digest is assembled per vendor at send time, turning a category off simply omits that line for every vendor on the next run. There is no per-vendor override here; these are account-wide digest defaults. Each run summarises the previous day's findings (a one-day window ending the prior day), and the digest is only sent when at least one of these toggles is on and there is something to report.
Where the settings live
- Email OTP Fallback is stored as a company global preference and read during the login flow.
- The five vendor toggles are stored as company vendor-alert preferences and read by the vendor digest command when it runs.
- The trusted Azure tenant is stored directly on the company record and read by the SSO callback.
Only the settings shown on this page are persisted — the page deliberately mirrors exactly what the backend saves, so a successful save reflects a real change.
Understanding the settings
| Setting | Section | Effect when ON | Effect when OFF |
|---|---|---|---|
| Email OTP Fallback | Authentication | Every member must enter an emailed one-time code at login — in addition to their authenticator step if they have one | No email step; members complete only their existing factors (password, plus their authenticator if configured), subject to any other policy |
| Trusted Azure AD Tenant ID | Single Sign-On | Adds the specified Entra tenant as a trusted issuer for first-login binding | Blank removes this pre-authorised tenant; Azure SSO still fails closed on the immutable tenant + object-ID binding, so an arbitrary directory cannot sign in on a matching email alone |
| Data Breach Alerts | Vendor Risk Monitoring | Breached-password findings appear in the vendor digest email | Category omitted from the digest |
| Vulnerability Alerts | Vendor Risk Monitoring | New or worsening vulnerability findings appear in the digest | Category omitted from the digest |
| Phishing Alerts | Vendor Risk Monitoring | Phishing and impersonation findings appear in the digest | Category omitted from the digest |
| Dark Web Discussion Alerts | Vendor Risk Monitoring | Dark web discussion hits appear in the digest | Category omitted from the digest |
| Telegram Alerts | Vendor Risk Monitoring | Telegram conversation findings appear in the digest | Category omitted from the digest |
Configuring the settings
- Open Settings → Global Settings as an administrator.
- Authentication — toggle Email OTP Fallback on if you want members without an authenticator app to receive an email code at login.
- Vendor Risk Monitoring Alerts — enable the categories you want in the vendor digest email, and disable the ones you consider noise.
- Click Save Settings. To abandon unsaved changes in these two sections, click Reset to restore the last saved values.
- Single Sign-On (Azure AD) — to enforce a trusted tenant, paste your Directory (tenant) ID GUID into the field, then click Save SSO Settings. To remove the restriction, clear the field and save.
The SSO field saves separately
The trusted-tenant field has its own Save SSO Settings button and validation messages. It is not committed by the main Save Settings button at the bottom of the page — save each section with its own button.
Common questions
Does Email OTP Fallback affect members who already use an authenticator app? Yes. When it is on, the email code is enforced for the whole company. Members with an authenticator complete their TOTP step first and are then asked for the emailed code as an additional factor; members without an authenticator go straight to the email code.
Is Email OTP Fallback the same as enforcing two-factor authentication? Not quite. It adds an emailed one-time code for the whole company but does not force anyone to enrol in an authenticator app. It gives every member an email-based second factor; to also require the stronger app-based factor, enforce 2FA at the account level.
What happens if I leave the Azure tenant field blank? Clearing the field removes the tenant you had pre-authorised for first-login binding, and the page shows a "Tenant check disabled" message. It does not open sign-in to any directory: Azure SSO still fails closed on the immutable tenant + object-ID binding (and Microsoft-verified domain check), so a login is never accepted on a matching email address alone. Setting a GUID re-adds that tenant as a trusted issuer.
My tenant GUID was rejected. Why? The value must match the GUID format exactly (eight-four-four-four-twelve hex characters). The format is validated in the browser and again on the server; a malformed value returns an error instead of being saved. Copy the Directory (tenant) ID from the Entra admin center rather than typing a domain name.
I turned off a Vendor Risk Monitoring toggle — did I stop collecting that data? No. The toggles only control what appears in the Vendor Risk Overview email. The findings are still gathered and remain visible in the Vendor Risk Management module; the toggle just removes that category from the digest.
Why can't my colleague see this page? Global Settings is administrator-only. Non-administrators are redirected to the dashboard. Ask an admin to make the change, or have your account owner adjust the colleague's role.
Do these settings apply to just me or the whole account? The whole account. Every control here is a company-wide default, which is why the page is limited to administrators.
Related
- Account Security — where individual members set up their own authenticator-based two-factor authentication, the personal counterpart to the account-wide Email OTP Fallback.
- Members — manage who has the administrator role required to edit Global Settings.
- Alert Preferences — configure news, CVE, and threat-feed notification settings that are separate from these global defaults.
- Vendor Risk Management — the module whose digest email is shaped by the Vendor Risk Monitoring Alerts toggles on this page.
- Roles & Permissions — how the administrator role gates access to account-level settings like this one.